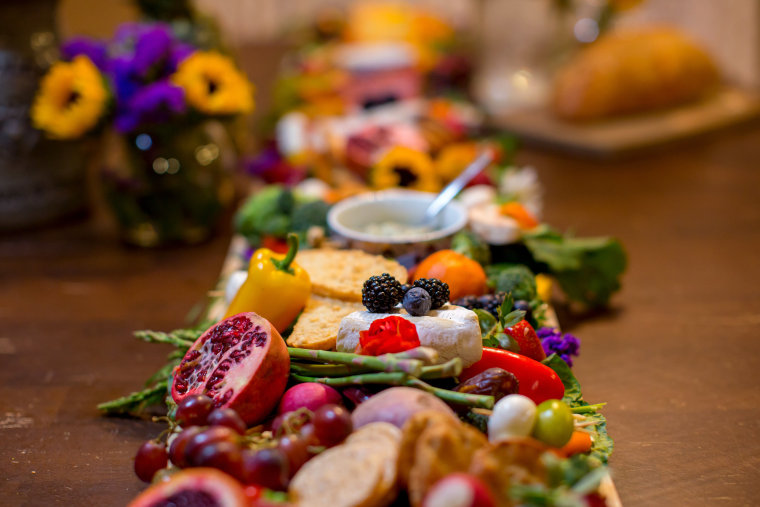
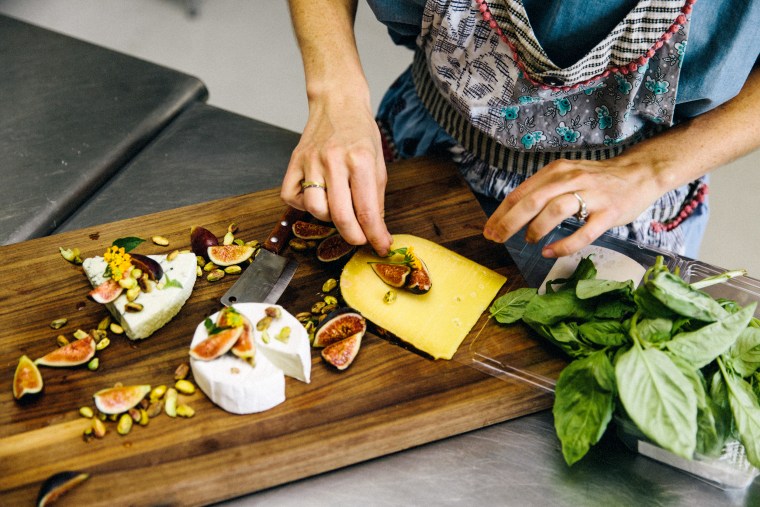
Growing up, charcuterie boards were at the center of every family gathering and party. I always watched in anticipation as my mom arranged fresh veggies, crackers and prosciutto-wrapped bread sticks in a way that worked like a magnet, pulling everyone to gather around the table, munching and chatting.
Now, as a party-planning adult myself, I never throw a gathering of any kind without a board in the center of the spread; in a way, it’s turned into a personal symbol of bringing people together (a symbol which I use often to justify my cabinet overflowing with platters of all shapes and sizes).
But there is one big problem. My arrangements are a mess. I always start with the highest of hopes: a Pinterest board full of luscious displays and two bags full of fixings that will inevitably wow my guests. But by the time I’m done re-stacking unruly crackers and shoving all of the chopped veggies into the space, it looks like a hodgepodge of ingredients, not a perfect symphony of artfully displayed finger foods.
After years of sad displays, I finally decided to learn how to craft a spread that would make mom proud. And I tapped the ultimate expert to learn how: April Collison, owner of Grazing Affair, a New-Jersey based company creating custom boards for backyard parties, weddings and every event in between, with the ultimate goal of promoting social dining and connecting over an abundant grazing board.

"I was raised in a big Italian family, and some of my fondest childhood memories are of everyone gathering around the polenta board on holidays," Collison told NBC News BETTER. "After creating an elaborate grazing board for a holiday party and seeing how it brought friends and family together, the idea for Grazing Affair was born."
From how to decide what ingredients to include on your board to creative display tricks that really elevate your spread, I got the lowdown so all of us can master the art of a charcuterie board, just in time for all of those summer celebrations.
How to select ingredients for your cheese board
My first mistake: filling two brown paper bags full of ingredients. Collison says to stick with the basics: cheese, meats, veggies, fruits, nuts and olives. Here are her guidelines for choosing foods in each category:
- Cheese: “I like to splurge on cheese, because its my favorite!" she says. "Find a local Italian store if possible; their cheeses will always be better than your local grocery store, in my opinion. Most cheeses should actually be served at room temperature, so don't worry about them sitting out." What is the magic number of varieties to offer? At least three. "I would recommend some combination of a pecorino Romano, a well-aged Gouda, Montasio cheese, an Asiago cheese (if you can find a wine Asiago, do it!) and something fun like a cheese with edible flowers in it or even a fruit,” says Collison.
- Meats: “Avoid ‘deli meats’ like turkey and ham and go for meats like prosciutto, cappicola, and hard salamis.”
- Veggies: “Go for the most vibrant colored if you can! Think about the colors of the rainbow as your guide. You'd be surprised at what you can find in your local grocery store if you really look around. Most of us go in with blinders on, grabbing food that we always buy," says Collison. "A crowd-pleaser is always rainbow carrots — people are amazed that carrots come in so many different colors. Other veggies that you can include are broccoli, asparagus (yes, raw), cauliflower (purple if you can find it), cucumbers, and green/yellow squash and Belgian endives are great for dipping.
- Fruits: assorted berries, kiwi, figs, grapes, even a melon. "You can ball the melon and put toothpicks in the balls," she adds. "If you want to get really crazy, wrap a balled piece of cantaloupe in a piece of prosciutto — delicious!”
- Nuts: “If no one has allergies, always add nuts! Pine nuts go best with cheese, but any nut will do — one of my favorites are almonds. Try to avoid nuts that guests will have to shell ... that’s no fun.”
- Olives: No discrimination here. Collison says any and every type of olive has a place on her boards.
How to arrange a cheese board so that it looks legit
Now that you have your ingredients, it's time for the hard part: arranging them. To simplify the process, Collison suggests plating your ingredients in this order:
- Largest food item
- Your "bowl" (holding a veggie dip or hummus)
- Crackers
- Fill in the space with fruits, veggies, cheeses, meats, nuts and olives
Step 1: Largest food items
“I always start with the largest food item that I'm putting on the board and build from there," says Collison. "So if I'm using a pineapple as a fruit bowl, that’s going on first; if I'm putting a loaf of Italian bread then that will go on first. And I tend to put the largest item in the middle."
Step 2: Your bowl
“Next I put on the ‘bowl’ that I will be using to hold my dip (usually a hummus)," she says. "I say ‘bowl’ because I never use an actual bowl, I use a fruit or veggie of some kind. This is where you can get creative and use a coconut, a hollowed out orange or grapefruit, or even a hollowed out lemon.”
Step 3: Crackers
Next, it's time for the crackers. (Let's be honest, you can't serve cheese without its crunchy counterpart.) "I always go to Trader Joe's for crackers." says Collison. "I get the 3-seed beet crackers (they are red), their Original Water Crackers, and their Multigrain & Flaxseed Water Cracker."
Step 4: Fill the holes
"Once you have the main items in place, you can start filling in your board with the fruits, veggies, cheeses, meats, nuts, and olives you have," says Collison. She shares some of her go-to tips for doing this.
- If you are using Belgian endives, place them near the hummus so people know what to do with them.
- Don't put too much of the same color near each other. "For example, you may want to put the cheese near the crackers, but that’s a whole lot of boring color in one spot," says Collison. "Instead, separate the crackers from the cheese with berries (blackberries, raspberries or blueberries).”
- Some of her presentation tricks include: Cutting kiwis (or even figs if you can find them big enough) into flowers; leaving grapes on the vine, and turning sturdy fruits like pineapples and coconuts into bowls (which not only looks great, but allows you to cut down on food waste!).
- Cut green squash into circles not match sticks — it's easier to dip, she says.
- Cut purple carrots lengthwise (into matchsticks) to show off their yellow centers. "You're getting two colors for the price of one," says Collison.
- She suggests lining the board with rainbow chard before putting anything else on it — not only does it elevate the look of your spread, but it saves you from having to invest in a new platter or board if yours has seen better days.
Go homemade with dips
When you're in a pinch, store-bought hummus will do the trick — just spoon it into a fruit or veggie bowl (a red pepper works great) to elevate your look. But when you have a little extra time, Collison says homemade hummus goes a long way in making your board feel personal, without taking a ton of extra time. She shared one of her go-to recipes with us:
Beet hummus:
2 cans of garbanzo beans
2 cloves of garlic
1 raw beet (peeled and chopped)
3 tbs avocado oil (you can substitute EVOO)
2 tbs tahini
Juice from 1 medium lemon
3/4 tsp (or to taste) of pink Himalayan salt
Place all ingredients in a food processor and blend until you have the consistency you want — usually about 2 minutes.
More party-planning tips
- 4 make-ahead batch cocktail recipes for spring and summer parties
- 12 better-for-you summer barbecue recipes
- Tips for hosting a stress-free dinner party
- Have a better summer BBQ with these two party tips
Want more tips like these? NBC News BETTER is obsessed with finding easier, healthier and smarter ways to live. Sign up for our newsletter and follow us on Facebook, Twitter and Instagram.
